If I can make someone smile or perhaps get a smile on MY face when I open my mailbox (which not one day goes by that I don't HOPE to find something FUN popping out of my mailbox) then I think I've done my job and tried to make the world is a BETTER place by making just one person happy! Addresses are sometimes altered for protection so the overall visual of the envelope may or may not be the way it was.

Tuesday, May 28, 2013

Birthday Cards/Envelopes!! I feel BLESSED!

From Pat.... the outside... YUMMY.. I love chocolate cake!

Pat's on the inside.. so perfect, you'd think it came from her printer....
Inside of Connie's card.... couldn't get it in the right position for some reason...
Front of card from my pal, Connie.


Envelope from Gabi... she took my flourishing workshop last month
and is "going to town"!

Beautiful card from Gabi!

Abbey's card... showing her diversity in the hands she has learned!
Way to go, Abbey!

Inside, from Abbey!

So much talent in this guild... THIS was from Anita...
complete with QUILLING!  LOVE IT!

Amy... always on top of all the "latest and greatest" on Pinterest and the internet
THIS is the really HOT item right now, she said!  Cool!  I have LOTS of corks I could use!

Jill made this one with love and care!

Gabi's inclusion in her card... from my little cherub, Ella.

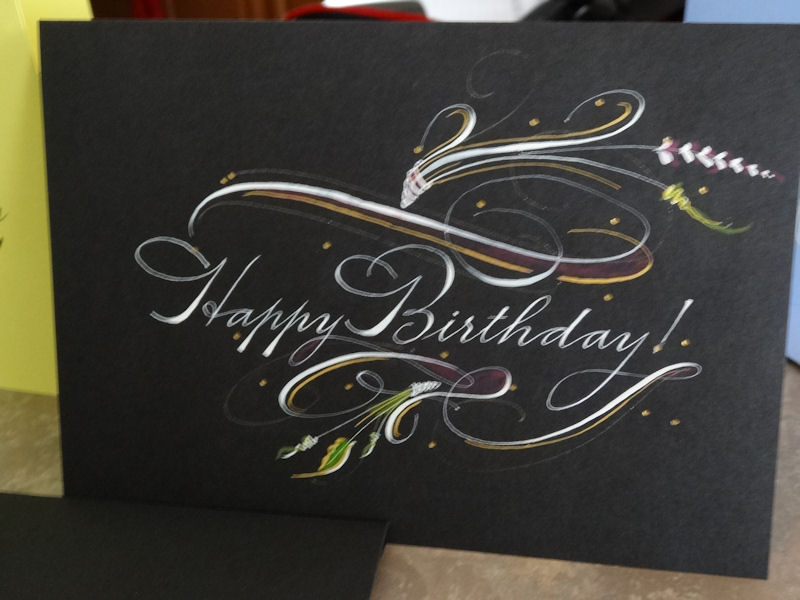
Although Alison isn't doing calligraphy, she found one of her "Stash"
favorite cards by Maria Thomas and it was simply lovely!

How cool is this?  Holly made this little box with a ....

Pop OPEN ....

SURPRISE!!!! With her version of  "Trish Trash"  Loved it!

Kate B. has out done herself this time with a very cooool
Letter "T"  She is a very accomplished calligrapher. I love her whimsy!

From Sandy.... a adorable, little paste paper booklet!

Love the colors and all the dots!!
One of my ALL TIME favorites:
from 3 1/2 year old Ella... it's her hands.... and sparkles!!!


And... I had to include this one.... it has music when you open it.....
and it's "naturally" from my hubby!  (We have three wiener dogs!)

And the music is the song:  "WHO let the dogs out WHO WHO!!?"

Saturday, May 25, 2013

More Paste Paper and recipe


Traditionally, I have always used Arches Text Wove for paste paper,
but I wanted to see what would happen if I used BLACK paper as
the starter color. I used Strathmore Artagain Black and it did
amazing.  I did notice that when I sponged it to get it all wet
that a lot of BlACK came off on the sponge. It didn't seem to
make much difference, though!

Another with black background


This was a technique that I learned from Victoria Pittman.
You actually squeeze out the full bodied acrylic paint from the
tube so it is standing up on the paper... then, you take a
texturing tool and make the swirls/marks.  Let it dry OVERNIGHT
and then iron on FOIL. It will only stick to the raised parts.
Yes.. be sure to use paper under and over it so that the foil
doesn't stick to the iron.

Here is a "lousy" shot of the gold that is adhering to
the acrylic paint that was raised

Here is Elena... creating her piece on some Canvas
Board she brought to try out


Close up shot of the "raised" acrylic and gold in some spots

Juanda... in creation mode....

Paste Paper at Shirley's

Shirley's studio is "to die for"... it's HUGE with EVERYTHING you
could ever imagine wanting or needing AT YOUR FINGERTIPS! 
It's full of light, overlooks the beautiful backyard and has one of the
cutest dogs, Rustle, who lives there *(a dachshund, of course)*
(This is one of my BEST Bud's, Sandy! I love her to pieces).
The backgrounds I was concentrating on were more for pieces which
I will be creating in the near future and for the CCS exhibit in the Fall
Therefore.....


I tended to keep this session less textured and crazy with a lot of space
to choose to write WORDS in !
This one, in particular was very bright before I did a
light layer of "tan" Titan Buff... I still might have to subdue it a
little bit more to get the effect I was intending

Another that I put a wash of titan buff over

I love these colors... I used black and white to get this luminous gray...

These colors were SO bright .. right out of the bottle and I had to
really tone them down a lot

I see some cropping potential here...

This was just plain fun.... using the bands that go around your
Starbucks coffee cups.  The inside of them is like corrugated
cardboard and really are fun to work with... SAVE Everything!
You never know if you can use it in making Paste Paper...
Forks, chopsticks, combs, coffee stirrers, cup holders....etc.

This one, Shirley use a cardboard box which had some
really cool, ladder looking texture potential but it didn't
turn out like thought it would.. .Happy accidents!

Depending on what you plan to use these background for
will determine how "BUSY you get with them...
If you're making a book or cards, the more texture the
better... but if you are making something to write
Calligraphic words on that will be the primary focal point
it's better to keep it calmer.

Sandy created this one. I really like the colors.. can't remember what tool she used.

I was really experiments with different layers on this and am not sure I
like it all that much, but it is growing on me.. I'm sure I can crop SOMETHING from it.

Play Date at Shirley's

Here is a great way to make quick paper backgrounds....

You take any water soluble markers and on freezer paper you
"scribble" or lay down some colors....

The more colors you have the more bright and colorful it will be
Here is Shirley... demonstrating...

So, here, we are done scribbling the "design" which will all meld together

Spritz with a spray bottle of water

All the colors bleed into each other
Then take a piece of cardstock or whatever paper you want to use
Lay it down on top of the blended inks

Quickly lift off and this is what you get... This was
THE FIRST mono print...

This was what happened after laying down another sheet of paper when
much of the color had already been picked up!
How simple and COOL is that!?